User Guide
Getting Doppio
Download the most recent
.shor.pkgpackage for your operating system
Note
Recent Doppio builds have files ending in .sh or .pkg. Older builds have files
ending in .zip, see the instructions for using those below.
Installing Doppio
Linux
Doppio will be installed in a single self-contained directory on your file system. Follow these steps to install it:
Find the
.shinstaller package that you downloaded and run it. You can do this in one of the following ways:In a file browser, find the icon for the
doppio-linux-<version>.shfile. Run it in the normal way for your system. Linux desktop environments vary in exactly how this is done, but typically you can double-click on the file, or right-click and select a menu option named something like “Run as a Program”.In a shell/terminal command prompt, go to the directory containing the
doppio-linux-<version>.shfile and run it by name. For example, if you downloadeddoppio-linux-1.5.0.shto~/Downloads, run the following commands to start the installation:cd ~/Downloads ./doppio-linux-1.5.0.sh
You will need to confirm that you have a suitable CCP-EM software licence. (Doppio is free of charge for academic use but a licence is still required.) Please see the CCP-EM website for information about how to obtain a licence.
The installer will ask where you want Doppio to be installed. The default location is
~/ccpem/doppio_<version>. Press Enter to select the default, or type a path of your choice to choose a different location. (Alternatively you can use the-p PREFIXoption when running the installer.) Note that the location you choose should not already exist.For more advanced usage, run the installer on the command line with
-hto see a list of options.The installer might take a few minutes to run, during which it will show various messages about the progress of the installation. At the end, it will ask if you want to update your shell config script (for example
~/.bashrc) to make Doppio available by default in your shell environment.If you enter “y”, Doppio will add a section like this to your config script:
# This section is automatically generated by CCP-EM Doppio
# Do not add or change anything between the >>> and <<< markers
#>>> doppio >>>
source /path/to/doppio_1.5.0/etc/doppio_paths.sh
#<<< doppio <<<
If you enter “n”, your shell config will not be modified. You will need to edit it yourself to make Doppio available, or call Doppio using a full path.
Note
Doppio uses the
doppio_paths.shfile to control which paths are added to thePATHenvironment variable. The Doppioappdirectory is always added. This contains thedoppio-webanddoppio-desktop.AppImagefiles that are used to launch Doppio. If any additional packages are installed through Doppio (see Installing additional software packages), the necessary paths to make those available are also added, as explained below.If you want to use Doppio immediately, start a new terminal or update your shell config by sourcing your config file again, for example in bash:
source ~/.bashrc
Start Doppio using the instructions below.
Mac
Doppio can be installed for all users on the system (with files in /Applications
and /Library) or just for the current user (with files in ~/Applications
and ~/Library). Only one copy of Doppio can be installed at once in each location.
In these instructions, [~] is used to indicate that the paths need a ~ prefix
for a single-user installation and not otherwise.
To install Doppio, follow these steps:
If you have a previous copy of Doppio installed in your desired location, remove it first:
Remove the desktop application (CCP-EM Doppio.app) from
[~]/Applications.Remove Doppio’s Conda environment
doppio_<version>from[~]/Library/ccpem.Note
It is not strictly necessary to remove the old Conda environment first unless it has the same version number as the new copy you want to install. However, we recommend you do remove it in order to reduce clutter, reclaim disk space and avoid confusion between different versions.
Note
Doppio also creates a web executable launcher in
[~]/Library/Application Support/ccpem/doppio_api. This will be replaced automatically by the installer so it does not need to be removed manually.
Run the
.pkginstaller package that you downloaded by double clicking on it and follow the prompts to install Doppio.You will need to confirm that you have a suitable CCP-EM software licence. (Doppio is free of charge for academic use but a licence is still required.) Please see the CCP-EM website for information about how to obtain a licence.
The installer usually takes a few minutes to run.
Note
You will see a message saying “Install time remaining: Less than a minute.” This is misleading! The installation might still take several minutes from this point.
Start Doppio using the instructions below.
Starting Doppio
Linux
The following applies to/has been tested on
WSL2 in Windows
Ubuntu 20.04, 22.04, 24.04
RHEL 8, Rocky Linux 9
Note
System dependencies: the web application doppio-web should run on most Linux
distributions without installing any additional system packages. The desktop
application doppio-desktop.AppImage might need some extra libraries to be
installed. For example, on the current default WSL2 distribution (Ubuntu 22.04),
you will need to run
sudo apt install libnss3 libfuse2 libatk1.0-0 libatk-bridge2.0-0 libcups2 libgtk-3-0 libgbm1 libasound2 libgl1
to install the necessary library files.
Desktop application
The desktop application will automatically run the Doppio web application in the background. When the desktop application is closed it will close the web application.
To start it from the terminal:
If you added Doppio to your shell config, run
doppio-desktop.AppImageOtherwise, run Doppio using a path to the file, for example
./doppio-desktop.AppImagefrom the directory where it is installed, or/path/to/doppio/app/doppio-desktop.AppImagefrom anywhere.
Alternatively, you can start Doppio by clicking on the launcher icon.
Note
If you launch the desktop application by clicking the doppio-desktop.AppImage file
rather than from the terminal, it will probably not use your normal shell config file,
so Doppio might not be able to find other software that is installed on your system.
Consider adding any paths and setup scripts that you want to use into the pipeliner
settings file, as explained here, so they will be
recognised by Doppio.
Web application
From the terminal:
If you added Doppio to your shell config, run
doppio-webOtherwise, run Doppio using a path to the file, for example
./doppio-webfrom the directory where it is installed, or/path/to/doppio/app/doppio-webfrom anywhere.
The server will start and your web browser will open automatically to view Doppio.
Note
If you do not want the web browser to open automatically, give the --no-browser
argument when you start the server: doppio-web --no-browser
Note
If Doppio does not open properly, see Troubleshooting below for some possible problems and solutions.
Mac
Desktop application
Find and launch the CCP-EM Doppio application from the launchpad.
Note
The first time the application is launched on a Mac it can take a long time (20 or 30 seconds) to load. Subsequent runs should be much faster.
Web Application
If you installed Doppio for all users, run
/Library/Application Support/ccpem/doppio_api/doppio-webIf you installed Doppio only for your user, run
~/Library/Application Support/ccpem/doppio_api/doppio-web
The server will start and your web browser will open automatically to view Doppio.
Note
If Doppio does not open properly, see Troubleshooting below for some possible problems and solutions.
Note
Safari behaves differently from all other browsers and does not handle Doppio’s authentication cookie properly. This causes Doppio to redirect back to the login page repeatedly. We recommend that you use Chrome or Firefox to access Doppio on a Mac, or you can use the Doppio desktop application instead.
If you really want to make it work in Safari, you can use a tool like mkcert to make a self-signed SSL certificate for localhost or 127.0.0.1 and pass this when you start Doppio (see Configuring server settings).
Remote access via SSH port forwarding
The Doppio web app can be run on a remote machine (e.g. HPC cluster) and accessed through a local browser (e.g. laptop) using SSH port forwarding. There is a helper script to do this automatically, or you can set it up manually.
Using the doppio-ssh script
Note
doppio-ssh is quite new and not yet widely tested. Please let us know if you
have any problems with it!
Doppio comes with a script called doppio-ssh that can be
used to set up port forwarding automatically. You can find the script in the app
directory inside the Doppio installation directory. You can also find a copy in the
Doppio downloads page on the CCP-EM
website. It is a standalone bash script, so you can copy it to any computer that you
want to run it on. (This includes Windows computers, where the script can be run in
WSL.)
doppio-ssh assumes that the doppio-web command is available on the remote host
that you connect to. If it is not, either modify your shell configuration (e.g.
~/.bashrc) on the remote host to put the Doppio app directory on the PATH,
or you can edit the COMMAND variable in the doppio-ssh script to include the
full path to doppio-web.
doppio-ssh passes all of its arguments directly to the ssh command, so if you
need any advanced options you can pass them as if you were running ssh normally.
For example, you can enable X11 forwarding with -X or -Y and then use Doppio to
open external graphical software such as Coot or ChimeraX, or if you need to connect
through an SSH gateway you can use the -J argument:
./doppio-ssh -J user1@gateway.host user2@final.host. (More information about this is
available in the Wikibooks OpenSSH Cookbook.)
As usual, you can also configure the options for the connection in your SSH config file
and then just pass the name of the host to doppio-ssh.
Usage:
Run
doppio-sshto connect to the remote host:./doppio-ssh <username>@<host>This will start Doppio running on a randomly-chosen open port and display a token.
Note
The token is randomly generated and will be different every time.
Doppio API token: ff44bc957339ac08b8efe6c68601804be9846d6a718c6d772bb8e2477544657d

INFO:     Started server process [654792]
INFO:     Waiting for application startup.
INFO:     Application startup complete.
INFO:     Uvicorn running on http://127.0.0.1:40945 (Press CTRL+C to quit)
INFO:     Doppio is now running.

Go to this link in your browser to open Doppio:

    file:///home/user/.local/share/doppio/doppio-654792-open.html

Or you can access Doppio directly using these details:

Server URL: http://127.0.0.1:40945/
Access token: ff44bc957339ac08b8efe6c68601804be9846d6a718c6d772bb8e2477544657d

Press Ctrl+C to quit this Doppio server

Forwarded local port 40945 to remote port 40945

doppio-ssh is opening your browser to navigate to: http://127.0.0.1:40945/
Your local web browser should open the Doppio authentication page automatically. If it doesn’t, copy the link displayed in the terminal and paste it into your browser. Alternatively, depending on your terminal, you might be able to Ctrl+click or Cmd-click the link to open it.
You will see the Doppio login page that looks like this:

Copy and paste the access token from the terminal and press submit.
Manaul port forwarding
If the doppio-ssh script doesn’t work for you or you need complete control of the
process, you can set up port forwarding manually instead.
In the terminal, ssh into the remote machine with port forwarding. The first part of this command may vary depending on your specific network setup.
ssh <username>@<remote ip address> -L <local_port>:127.0.0.1:<remote_port><remote_port>and<local_port>are the ports Doppio will use on the remote machine and the port that it will be forwarded to on the local machine. These can be any free port.On the remote machine, start Doppio with the command:
doppio-web -p <remote_port> --no-browserThis will start Doppio running on the specified port and display a token.
Note
In this example,
<remote_port>was set to1430and<local port>to34231.The token is randomly generated and will be different every time.
Doppio API token: 5a3aaf399486f095e78acc6c6cdb3082b2a55c43586a7c430b5885776ecd9eb2

INFO:     Started server process [80427]
INFO:     Waiting for application startup.
INFO:     Application startup complete.
INFO:     Uvicorn running on http://127.0.0.1:1430 (Press CTRL+C to quit)
INFO:     Doppio is now running.

Go to this link in your browser to open Doppio:

    file:///Users/tjg99114/Library/Application%20Support/doppio/doppio-80427-open.html

Or you can access Doppio directly using these details:

Server URL: http://127.0.0.1:1430
Access token: 5a3aaf399486f095e78acc6c6cdb3082b2a55c43586a7c430b5885776ecd9eb2
On the local machine, open a web browser to
http://127.0.0.1:<local_port>. You will see a login page that looks like this:
Copy and paste the token from the terminal and press submit.
Configuring Doppio
Finding RELION and CCP-EM programs
Doppio runs jobs using the CCP-EM Pipeliner which comes with job definitions to run various RELION, CCP-EM and other jobs. However it does not include the programs themselves, so to run them you will need to install those programs in the Doppio application or separately.
As a general rule, if you can set up the program so its directory is
on your system PATH and it can be called by name without needing to run special
environment setup commands first, Doppio will find and use it automatically. You can
also edit the pipeliner settings file to add setup scripts (that will be sourced while
launching Doppio) and program paths as explained here.
To run RELION jobs, you will need a copy of RELION 4.0 or 5.0 installed on your computer. The last nightly builds of the CCP-EM v1 software suite also include a copy of RELION 4.0, so that provides a convenient route to install CCP-EM and RELION together, but you can also use Doppio with a separate standalone copy of RELION.
For downstream processing and atomic model building, you will need CCP4 9, CCP-EM > 1.6 and/or other external tools installed. For more details on how to download and install CCP-EM, CCP4 and other tools that are currently supported by Doppio, read the instructions here.
You can use the package-ccpem2 scripts to install some other useful programs.
Put the paths to your CCP4, CCP-EM and package-ccpem2 setup scripts into the pipeliner settings file, as explained here.
Note
Older versions of CCP-EM (including v1.6.0) contain RELION 3.1, which will not work properly with Doppio. Either use a newer copy of CCP-EM, or install a separate copy of RELION 4.0 and set up your environment so the new version is found first. One way to make sure of this is to delete the RELION 3.1 executables from the CCP-EM directory:
cd /path/to/ccpem-1.6.0/bin
rm relion*
Finding additional packages
For packages that have been installed through the Doppio GUI (see
Installing additional software packages),
the paths to the executables will be stored in Doppio’s etc/doppio_paths.sh file.
More paths are added to the file each time a new package is installed.
On Linux, you can add the following lines to your ~/.bashrc file to make sure the
doppio_paths.sh file is sourced every time you start a new shell:
#>>> doppio >>>
source /path/to/doppio/etc/doppio_paths.sh
#<<< doppio <<<
On Mac, your pipeliner settings file will be updated with the path to the doppio_paths.sh when you
navigate to the page to install these packages.
Choosing the project directory
From Doppio version 1.5.0 onwards, each separate instance of Doppio can work in a different project. Older versions used a single project that was shared between all instances.
Note
Here, “instance” means a Doppio server process, i.e. the program that runs when you
run the doppio-web command, or is run for you in the background when you start
the Doppio desktop application. It does not refer to the Doppio user interface that
you see in your web browser. You can have several browser tabs or windows pointing
at the same Doppio server instance if you like, but they are not separate
“instances” and they will all access the same project.
When Doppio starts, it reads the current project setting from the settings file. You can then change to a different project using the controls within Doppio (see Switching projects and Doppio settings below).
If necessary, you can also change this and other settings before starting Doppio by editing the settings file yourself. Details of how to do this can be found in the configuration page.
Using Doppio
Overview
Doppio is a new web-based GUI for RELION and CCP-EM. Many of the concepts in Doppio are very similar to those in the RELION GUI, but the layout is quite different.
When you first start Doppio you will see the project home page, which will look something like this:
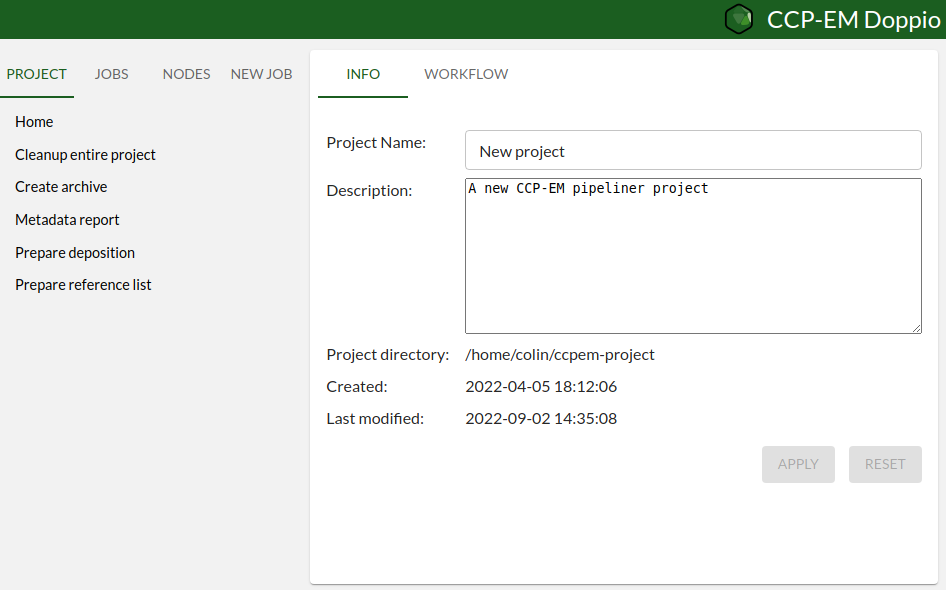
The left panel acts as a navigation menu, with details displayed in the right panel. Some pages (including the project home page, as seen in the image above) have multiple sub-pages which appear as tabs in the right panel.
The tabs in the left panel are:
The Project tab, which gives access to the project home page and other information and actions for the project as a whole.
The Jobs tab, which shows the jobs that have been run in this project.
The Nodes tab, which has not been implemented yet but will list the project’s data nodes (i.e. job inputs and outputs).
The New Job tab, which lists all the available types of jobs and allows you to run them.
Behind the scenes, Doppio uses the CCP-EM Pipeliner to handle all of its interactions with the project. The Pipeliner builds on the pipeline approach that was originally introduced for RELION 2.0. If you want to understand more about how it works, please refer to the CCP-EM Pipeliner documentation.
Creating a new job
To create a new job, click on its name in the New Job list. Note that some job types
might be unavailable if Doppio was unable to find the executables they need. For
example, all of the RELION jobs will be unavailable if the RELION programs were not
accessible through the PATH environment variable when Doppio was started. You can
see all the job types by selecting “Show unavailable jobs” in the menu next to the job
type search box:

If jobs you expected to see are marked unavailable see: Configuring the CCP-EM Pipeliner
Importing files
As in RELION, files must be imported into the project before you can run jobs that use them. All files to be imported must be accessible by relative paths within the project directory, either by copying them into the project or using symlinks.
There are several job types available for importing files, which can be found in the Import section of the New Job tab:
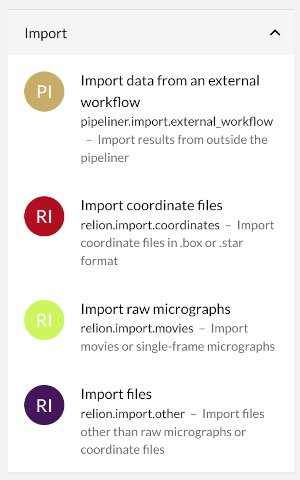
To import coordinate files or raw micrographs, use the specific ‘Import coordinate files’ and ‘Import raw micrographs’ job types. Any other type of file can be imported using the ‘Import files’ job.
Selecting input files
Some inputs only allow files to be selected that are already part of your Doppio project. Files used as input for jobs can be selected from a drop down menu after clicking in the input box:

The menu offers a choice of the files of the required type that are already present in the project.
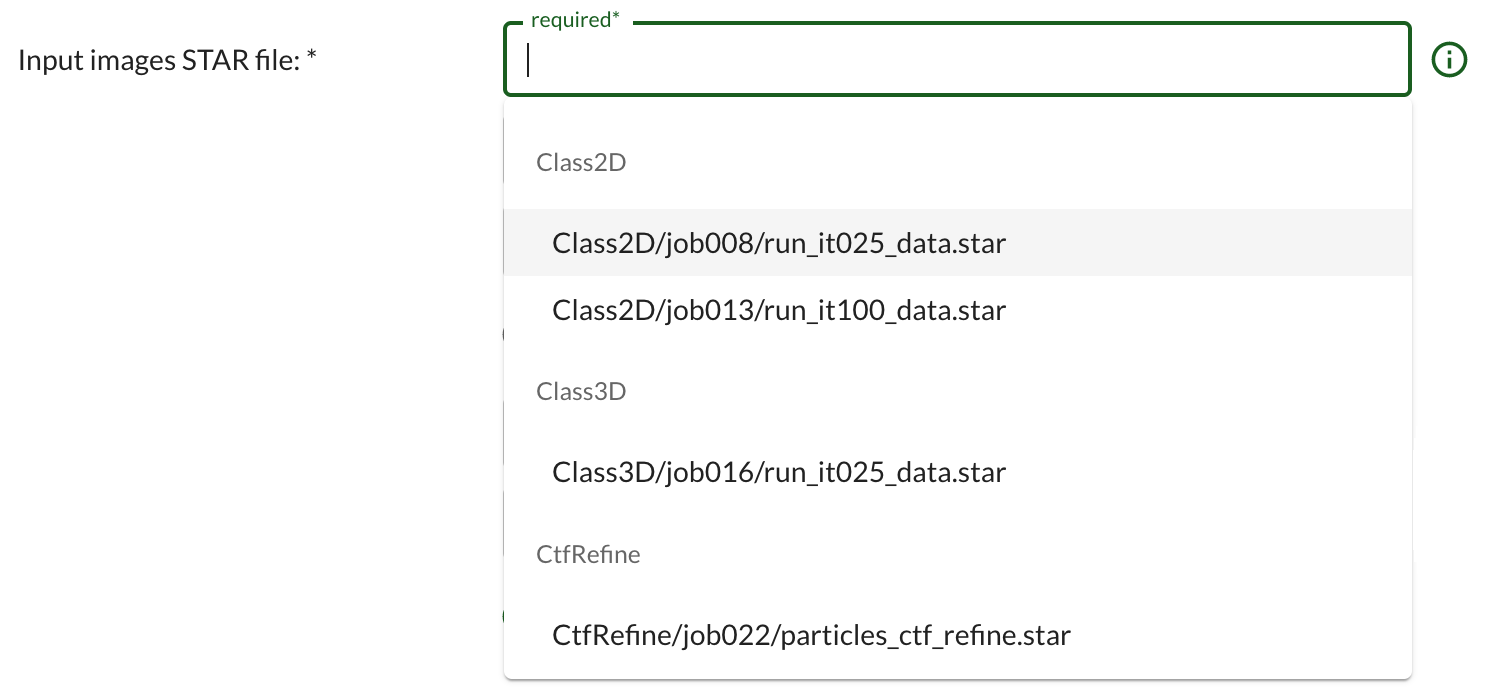
If a file is not listed it needs to be imported into the project before it can be used.
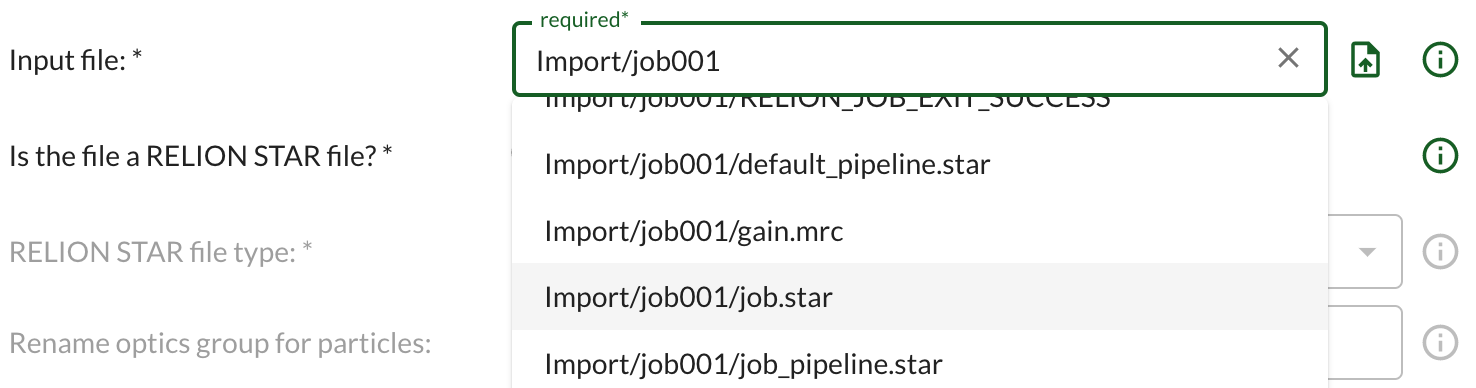
For other inputs, files from outside the project can be uploaded to Doppio and they will automatically be added to the project when the job runs. The green upload icon allows files to be added using drag-and-drop or a file browser. Files that are already in the project can be selected from the drop down menu.
Note
File selection in Doppio is being actively developed and the details are likely to change in future versions.
Submitting jobs to a queue
Doppio allows for jobs to be submitted to a queueing system using a submission script template.
Jobs that allow queue submission will have a set of queue options which will be used along with some parameters in the job’s running options:
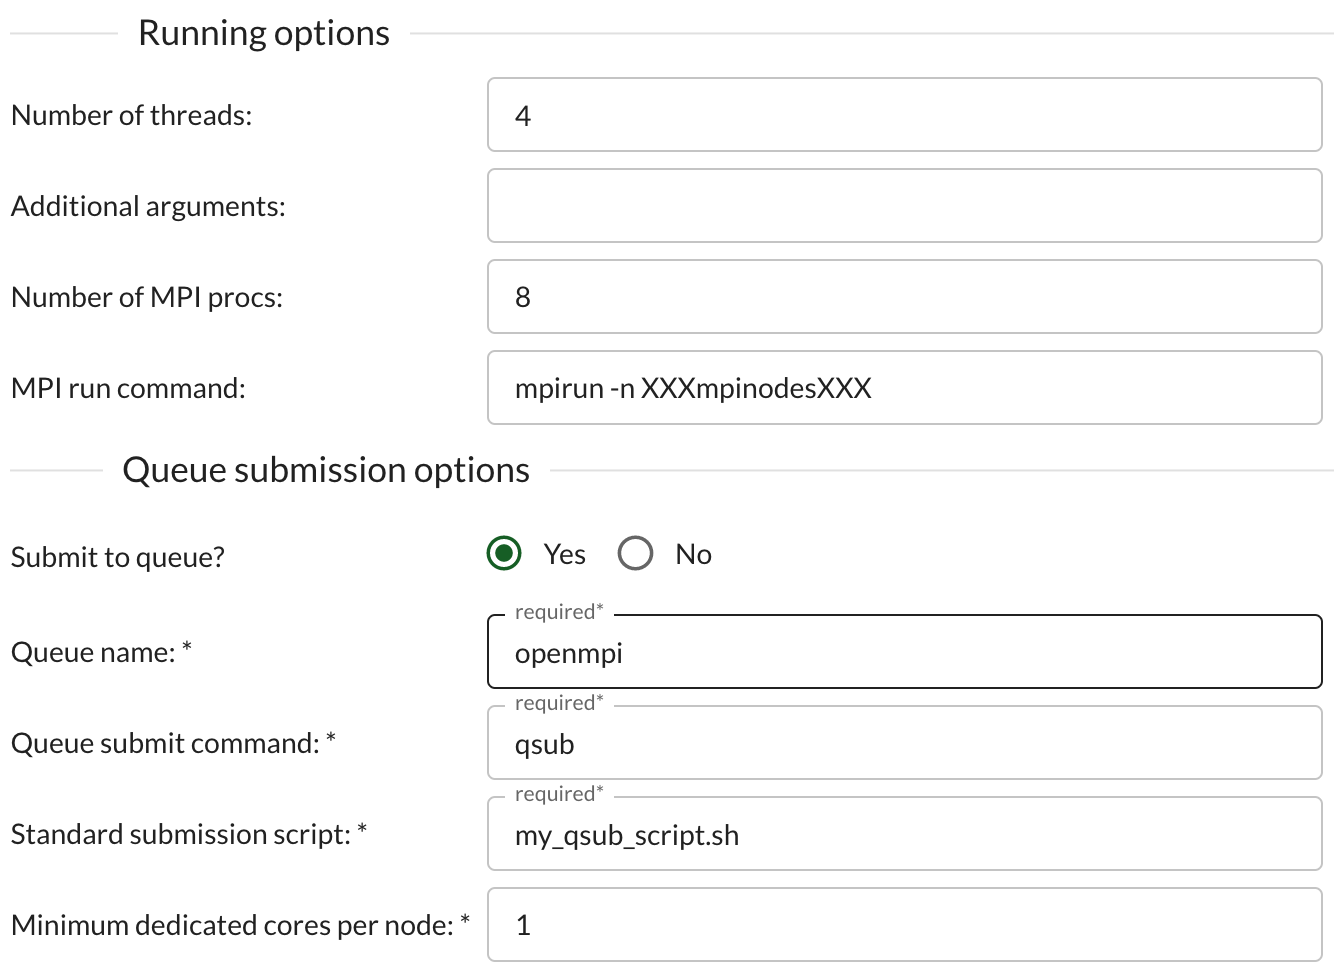
The submission script must contain specific variables bracketed by XXX. These will
be replaced with values from the queue submission and running options. The submission
script will then be run with the command in the ‘Queue sumbmit command:’ field.
GUI Field |
Script Variable |
|---|---|
Number of MPI procs: |
XXXmpinodesXXX see note |
Number of threads: |
XXXthreadsXXX see note |
Minimum dedicated cores per node: |
XXXdedicatedXXX |
Queue name: |
XXXqueueXXX |
There are additional variables available for submission scripts that are not drawn from the GUI parameters:
Script Variable |
Substitution |
|---|---|
XXXnameXXX |
The job’s name; the same as its output directory |
XXXcoresXXX |
The number of mpi processes * the number of threads |
XXXerrfileXXX |
Path to the job’s |
XXXoutfileXXX |
Path to the job’s |
XXXcommandXXX see note |
The full commands list for the job. |
Note
The commands in the XXXcommandXXX variable will already have the mpirun command specified by the
‘MPI run command:’ parameter prepended to commands where necessary. Therefore the
XXXmpinodesXXX variable generally does not need to be included in the submission script.
The default ‘MPI run command:’ is mpi_run -n XXXmpinodesXXX meaning the
XXXmpinodesXXX variable generally also does not need to be included in the
the submission script template.
Similarly, the number of threads is usually included in the commands, generated
by the job, so the XXXthreadsXXX variable rarely needs to be used.
The submission script template must be written for your specific system. An example submission script template:
#!/bin/tcsh

#$ -pe XXXqueueXXX XXXmpinodesXXX
#$ -l dedicated=XXXdedicatedXXX
#$ -e XXXerrfileXXX
#$ -o XXXoutfileXXX
#$ -A Relion
#$ -cwd
#$ -S /bin/tcsh

XXXcommandXXX
Custom queue submission variables
Doppio allows for four additonal queue submission variables in the submission template:
XXXextra1XXX, XXXextra2XXX, XXXextra3XXX, and XXXextra4XXX. These allow
for additional custom options to be added to jobs’ queue submission parameters.
The extra queue submission parameters can be set in the ccpem-pipeliner settings (typically
~/.config/ccpem/pipeliner/ on Linux or ~/Library/Application Support/ccpem/pipeliner/
on Mac). For each variable the name of the field in the GUI, default value, and help text can
be set with:
|
The name of the field that will appear in the GUI |
|
The default value for the parameter |
|
The help text for the parameter |
If these variable are set, additional fields will appear in the queue submission options section of the GUI.
Job actions
The jobs in the current project are listed in the JOBS tab in Doppio’s left panel. Next to each job is a menu icon with three vertical dots: ⋮
Clicking this will bring up a menu of actions that can be performed on that job:
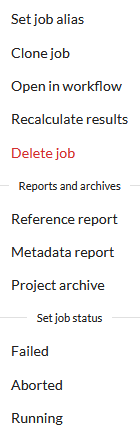
Set job alias
Use this action to set or change the job’s alias.
Clone job
This action creates a new job with the same type and options as the selected job. This is very useful for running multiple jobs with small adjustments to the options.
Open in workflow
This action opens the Project workflow page and highlights the selected job.
Recalculate results
This action forces a recalculation of the job’s results displays (i.e. everything that appears in the job’s RESULTS tab). This can be useful if there were errors calculating the results, for example if a file was previously missing but it is now present, or if results were calculated before the job was finished and you want to update to view the final results.
Abort job
This action will stop a running job. It can take a few seconds for the job to respond to the signal to stop, and in general it will not write any new results files when it stops so the only results available will be those already written (for example, results from completed iterations of a 2D or 3D classification job).
One important exception to be aware of is for jobs that have been submitted to a queue. If the job has not started running yet, it cannot respond to the abort signal, so it will remain in Running state until it is started by the queue manager, at which point it will immediately abort without doing anything. If you want to cancel a job that is still waiting in the queue, it is usually better to use the queue manager’s tools to remove it from the queue, and then delete the job or mark it as Aborted in Doppio.
Delete job
This action will delete the selected job and all downstream jobs that use files from it as inputs.
Warning
Delete job deletes all jobs that depend on the selected job! This can have surprising effects, for example if a file has been uploaded to Doppio as an input to the first job, then this job is cloned and a second job uses the same input file, then deleting the first job will also cause the second job to be deleted.
Deleted jobs are moved to the Trash directory inside the project. Currently, Doppio
does not provide a way to view or restore files from the Trash. (This will be improved
in future versions.) If you need to restore a deleted job, you can do this by using the
CCP-EM Pipeliner’s pipeliner --undelete_job command, or opening the project in the
RELION GUI and using the Undelete job option in the Jobs menu.
Reference report
This action will generate a report containing reference citations for the selected job and all of its upstream jobs. The report can be viewed by selecting the Literature references page in Doppio’s PROJECT tab.
Metadata report
This action will generate a report containing metadata about the selected job and all of its upstream jobs. The report can be viewed by selecting the Metadata reports page in Doppio’s PROJECT tab.
Project archive
This action will generate an archive of the selected job and all of its upstream jobs.
There are two types of archive: a simple or script archive, which contains only the original input files and job options along with a script that allows all the jobs to be re-run to recalculate the intermediate and final results, or a full archive which saves a copy of the full job directories.
Note
If you are planning to create a full archive, it can be helpful to clean up the project or some specific jobs to remove unneeded intermediate files.
Project archives can be viewed by selecting the Project archives page in Doppio’s PROJECT tab.
Set job status
The actions in this part of the menu can be used to override the status of a job. This should not usually be necessary but can occasionally be useful in specific situations.
For example, if a 2D or 3D classification job has produced good intermediate results, you can abort the job and then mark it as Succeeded to use the intermediate results as final results. Or if you have manually changed a job submitted to a queue (for example you cancelled a job that was waiting in the queue, or re-submitted a failed job after editing its queue submission script) it can be helpful to update Doppio’s job status to match afterwards.
Switching projects and Doppio settings

The settings bar on the upper left allows the user to change the Doppio theme (controlling which jobs are available and how they are displayed) and switch between projects.
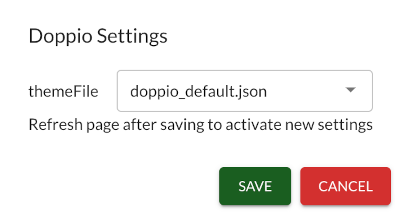
The gear icon opens the settings menu, which allows selection of a Doppio theme:
The pencil icon opens a drawdown menu that allows users to switch to a different project in the list of available projects.

To add an existing project to this list or create a new project use the + icon on the right.
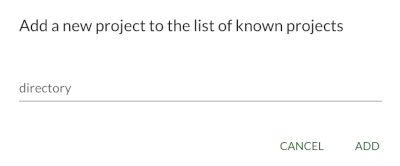
If the path specified in the Add project dialog does not contain a Doppio project, a new one will be created at this location.
Installing additional software packages
Doppio can install some additional software packages for you. This feature can be found in the “Install additional packages” page in the “Project” tab.
To install a new package, click its “Install” button.
Additional packages are installed in self-contained directories in the envs
directory inside Doppio’s Conda environment. This has two important implications:
If a package installation fails you can safely remove it without affecting the rest of your system.
If you install a new version of Doppio, it will create a new empty
envsdirectory and any additional packages will need to be re-installed. We recommend you delete the old Conda environment to reduce clutter and reclaim disk space.
Note
This feature is quite new. If you run into problems, please contact us at ccpem@stfc.ac.uk to let us know!
Using older Doppio versions
Doppio versions before v1.3 were distributed as .zip files. To use them, follow
the instructions in this section instead of the ones above.
Getting Doppio
Download the most recent
.zippackage for your operating systemExtract the zip you just downloaded in an appropriate place
Linux
The following applies to/has been tested on
WSL2 in Windows
Ubuntu 18.04, 20.04, 22.04
CentOS 7, RHEL 8
Note
System dependencies: the web application doppio-web should run on most Linux
distributions without installing any additional system packages. The desktop
application doppio-desktop.AppImage might need some extra libraries to be
installed. For example, on the current default WSL2 distribution (Ubuntu 22.04),
you will need to run
sudo apt install unzip libnss3 libfuse2 libatk1.0-0 libatk-bridge2.0-0 libcups2 libgtk-3-0 libgbm1 libasound2 libgl1
to install the necessary library files.
Desktop application
Run
./doppio-desktop.AppImageto launch the desktop application
Note
This will automatically run the Doppio web application in the background. If the web application is currently running it will be closed and a new instance will be started. When the desktop application is closed it will close the web application.
Note
If you launch the desktop application by clicking the doppio-desktop.AppImage directly
rather than from the terminal, add the setup scripts for CCP4 and CCP-EM into
the pipeliner settings file, as explained here,
so they will be recognised by Doppio.
Web application
Navigate to the directory in which you extracted the application files in the previous section in the terminal
Run
doppio-web/doppio-web(orapp/doppio-webif running Constructor build) to run the API and web applicationThe server will start and your web browser should open automatically to view Doppio
Note
If you do not want the web browser to open automatically, give the --no-browser
argument when you start the server: doppio-web/doppio-web --no-browser
Note
If Doppio does not open properly, see Troubleshooting below for some possible problems and solutions.
Mac
The Doppio PyInstaller Mac builds (.zip files) are quarantined on download. Before installing
Doppio you will need to remove the quarantine tags. Using the Terminal, please run the
following command before unzipping and installing as described below.
Navigate to the directory in which you extracted the application files in the previous section in the terminal
Run
sudo xattr -r -d com.apple.quarantine ..
Desktop application
Navigate to the directory in which you extracted the application files in the previous section in the Finder
Ctrl-click (or right click) on
doppio-desktop.pkgand clickOpen(only for PyInstaller build)Proceed through the installer
Once the installer has completed you should be able to find and launch the
CCP-EM Doppioapplication from the launchpad
Note
The first time the application is launched on a Mac it can take a long time (20 or 30 seconds) to load. Subsequent runs should be much faster.
Web Application
In the directory in which you extracted the application files, run
doppio-web/doppio-webto run the API and web applicationThe server will start and your web browser should open automatically to view Doppio
Note
Doppio does not work in Safari. (This is due to a bug in Safari’s handling of secure cookies, which causes Doppio’s authentication to fail.) We recommend that you use Chrome or Firefox to access the Doppio web application on a Mac.
If Doppio does not open properly, see Troubleshooting below for some possible problems and solutions.
Troubleshooting
Jobs are missing
If jobs you expected to see are marked unavailable it may be because the pipeliner does not know the paths to programs needed to run them. See Configuring the CCP-EM Pipeliner.
The browser does not open after starting doppio-web
When the Doppio server starts, it will print output like this to the terminal:
Doppio API token: 6d4147b537b041d45845fd10056c6b79410aec6f5512f963d8ec17748076f533

INFO:     Started server process [1234]
INFO:     Waiting for application startup.
INFO:     Application startup complete.
INFO:     Uvicorn running on http://127.0.0.1:34675 (Press CTRL+C to quit)
INFO:     Doppio is now running.

Your web browser should open Doppio automatically. If it doesn't, go to this link:

    file:///home/user/.local/share/doppio/doppio-1234-open.html

Or you can access Doppio directly using these details:

Server URL: http://127.0.0.1:34675
Access token: 6d4147b537b041d45845fd10056c6b79410aec6f5512f963d8ec17748076f533

Press Ctrl+C to quit this Doppio server
As the message says, your default web browser should open automatically. If it doesn’t,
you can open it manually by clicking on the file:///... link.
(Depending on your terminal, you might need to click, double-click, Ctrl-click or
Command-double-click on the text to open the link.)
Opening Doppio with the file:///... link should automatically authenticate your
connection. If that doesn’t work for any reason, you can also use the
http://127.0.0.1:<port> address that is shown after Server URL: to go directly
to Doppio. You will need to copy and paste the access token into the login form that
appears. See Security in Doppio for more information.
Note
The port will be different each time you start Doppio, unless you specify a fixed port to use instead. See Configuring server settings for more details.
If the automatic browser launch is causing problems for any reason, you can disable it
by passing the --no-browser argument to the server, for example
doppio-web --no-browser.
Note
For WSL users: Doppio can try to open your host (i.e. Windows) browser when you
run doppio-web in your WSL Linux environment. You will need to tell the system
what web browser to use by setting the BROWSER environment variable. If you have
the wslu package installed, you can set BROWSER=wslview to open Doppio in
your default Windows browser. Or you can set BROWSER as the full (Linux-style)
path to a browser executable to launch that browser directly, for example:
BROWSER='/mnt/c/Program Files/Mozilla Firefox/firefox.exe' doppio-web
As with any environment variable, you can set BROWSER by default for all shell
sessions by exporting it in your ~/.bashrc file (e.g. by adding the line
export BROWSER=wslview) or you can set it for a single command by putting it as
a prefix before the command itself, as in the Firefox example above.
The browser displays an “Unauthorised” message
If you try to access Doppio without proper authentication, you will see a login page that looks like this:
Note
For Mac users: you will not be able to get past this login page if you try to open Doppio in Safari, because of a bug in the way Safari handles secure cookies. Please use a different browser such as Chrome or Firefox to access the Doppio web app, or use the desktop app instead.
The access token you need is logged to the terminal when the Doppio server starts.
(See above for an example.) Look for a line that starts
Doppio API token: or Access token:, copy the value that follows and paste it
into the form. If that doesn’t work, double check that you are connecting to the right
server – the URL in your browser address bar should match the server URL that is shown
along with the access token in the server start-up message. If you are running multiple
instances of Doppio you could easily have the wrong port number in the address. If
all else fails and you can’t find the right token, quit Doppio (press Ctrl+C in the
terminal that’s running the server) and restart.
See Security in Doppio for more information.
The browser was denied access to the file
This error occurs if your web browser does not have permission to access the local file that Doppio uses to initialise its user authentication. (See Security in Doppio for more information about this.) The error message typically looks something like this:

This is known to occur with the default Firefox browser on recent Ubuntu distributions (22.04 or newer), which is installed as a Snap package that runs in a sandbox that prevents it from accessing Doppio’s launch file in its normal location.
To fix this, you can set the DOPPIO_RUNTIME_DIR environment variable to a path which
the browser has permission to access, which for Firefox on Ubuntu means any non-hidden
path inside $HOME or the hidden directory ${HOME}/.mozilla/firefox.
For example, either of the following examples should work (but the latter will create a
new non-hidden doppio-runtime directory inside your home directory, which might be
unwanted):
DOPPIO_RUNTIME_DIR=${HOME}/.mozilla/firefox doppio-web
# or
DOPPIO_RUNTIME_DIR=${HOME}/doppio-runtime doppio-web
As with any environment variable, you can set DOPPIO_RUNTIME_DIR by default for all
shell sessions by exporting it in your ~/.bashrc file (e.g. by adding the line
export DOPPIO_RUNTIME_DIR=${HOME}/.mozilla/firefox) or you can set it for a single
command by putting it as a prefix before the command itself, as in the example above.
If you find other browsers or operating systems where this error occurs, please let us know so we can work out how to fix it and add instructions here to help other users.
Error while attempting to bind on address
If you see an error like:
ERROR: [Errno 13] error while attempting to bind on address ('127.0.0.1', ####): permission denied
it means that the API failed to start because the port it was trying to use is already in use. Normally, an open port should be selected automatically, so you should only ever see this error if you specified a particular port when you started Doppio. Typically that would only be done when you intend to run only one instance of Doppio at once, so if you see this error you should check to see if the Doppio API is already running. If it has crashed you might need to kill the old API process before you can start a new one.
SUID sandbox error
When running the Linux desktop application, if you get an error that looks like:
The SUID sandbox helper binary was found, but is not configured correctly...
You will need to run ./doppio-desktop.AppImage --no-sandbox instead.
Frozen window or unavailable API
If Doppio gets stuck on the ‘spinning wheel of death’:
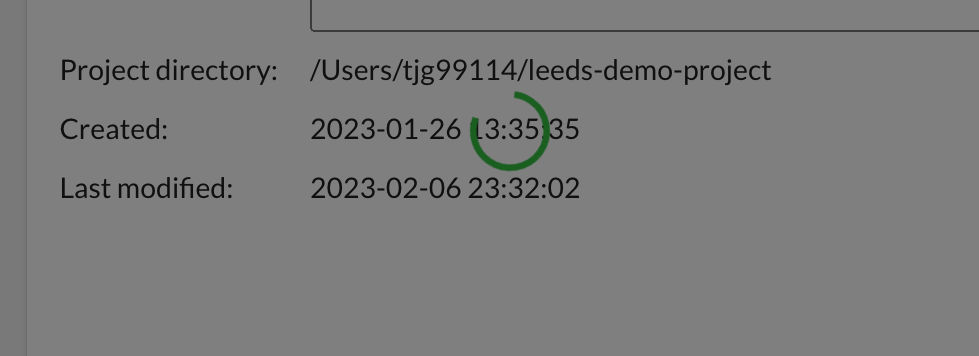
or if the ‘API unavailable’ message appears for more than a few seconds:
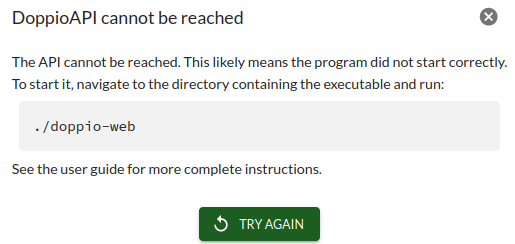
check the server console logs (see below) to see if there has been an error.
If you see that the last requests in the server logs finish with 401 Unauthorized,
it means that Doppio’s authentication cookie has expired. You can fix this by refreshing
the page and entering your access token (see The browser displays an “Unauthorised” message), or restarting
Doppio (i.e. find the terminal which you used to launch Doppio, press Ctrl+C to stop the
server and then run Doppio again).
One possible (but rare) cause of the “DoppioAPI cannot be reached” message is that the project file has become corrupt, or the project lock has been left in place by mistake.
This problem can usually be solved by running the Pipeliner project recovery script.
You can get this by downloading recover_project.py from the Doppio download page
(see above), or if you have a separate copy of the CCP-EM
Pipeliner installed, it should be available through the command
pipeliner.recover_project.
Once you have the script, go to your project directory (~/ccpem-project by
default), run the recover_project.py script and follow the instructions. It will
offer to remove the project lock if present and replace the pipeline file with the most
recent available backup.
Warning
Be careful with the recovery script! If you run it while Doppio or the Pipeliner are actively working on your project, you could cause a new problem instead of fixing one. Make sure you stop all running Doppio and Pipeliner processes before you try to recover the project.
Logs
On Linux application logs will be printed to the terminal.
On Mac application logs are written to the ~/Library/Logs/doppio directory.